Titan – Configuration: WiFi
¿Buscas alguna otra cosa?
The “WiFi” configuration section refers to the WiFi network configuration. By using a WiFi connection, we can provide WiFi enabled devices with access to the Internet.
Table of Contents
WiFi: Basic Settings
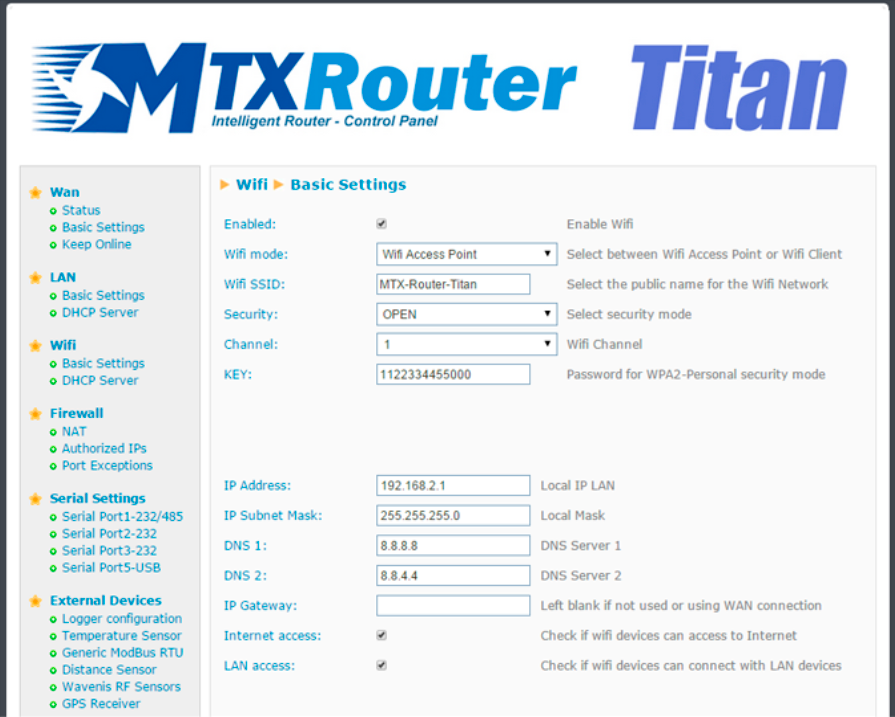
This section explains the basic configuration parameters for a WiFi connection.
- Enabled: This parameter activates the WiFi interface for the Titan router
- WiFi mode: this parameter allows we to select either “WiFi Access Point” or “WiFi Client” as the work mode. “WiFi Access Point” is recommended if we wish to use the Titan router to provide Internet access to WiFi enabled devices using 3G. “WiFi Client” is recommended if we wish to use an existing WiFi infrastructure (for example, the company’s ADSL/cable connection) to provide Internet access.
- WiFi SSID: public SSID (in “WiFi Access Point” mode this indicates the SSID created by the Titan router; in “WiFi Client” mode this indicates the SSID that the Titan router will connect to)
- Security: this parameter allows we to specify the WiFi security mode. WPA2 is recommended
- KEY: this parameter specifies the WiFi password that is necessary for WPA2 mode
- IP Mode: in “WiFi Client” mode this specifies if a local static IP address is to be used or whether the IP address should be taken using DHCP
- IP Address: this parameter indicates the IP address for the WiFi interface. The default value is 192.168.2.1
- Subnet mask: this parameter indicates the subnet mask for the WiFi interface
- DNS1: this parameter indicates the main DNS server
- DNS2: this parameter indicates the secondary DNS server
- IP Gateway: in “WiFi client” mode, this parameter allows we to specify the gateway to be used when the local IP address is static
- Internet access: this parameter should be activated in order to connect to the Internet from a WiFi enabled device
- LAN access: this parameter should be activated in order to connect to devices connected to the router’s Ethernet port from a WiFi device
ADDITIONAL NOTES
- Once the configuration is finished, click “SAVE CONFIG” to save the changes. Remember that the router should be restarted for the changes to take effect
WiFi: DHCP Server
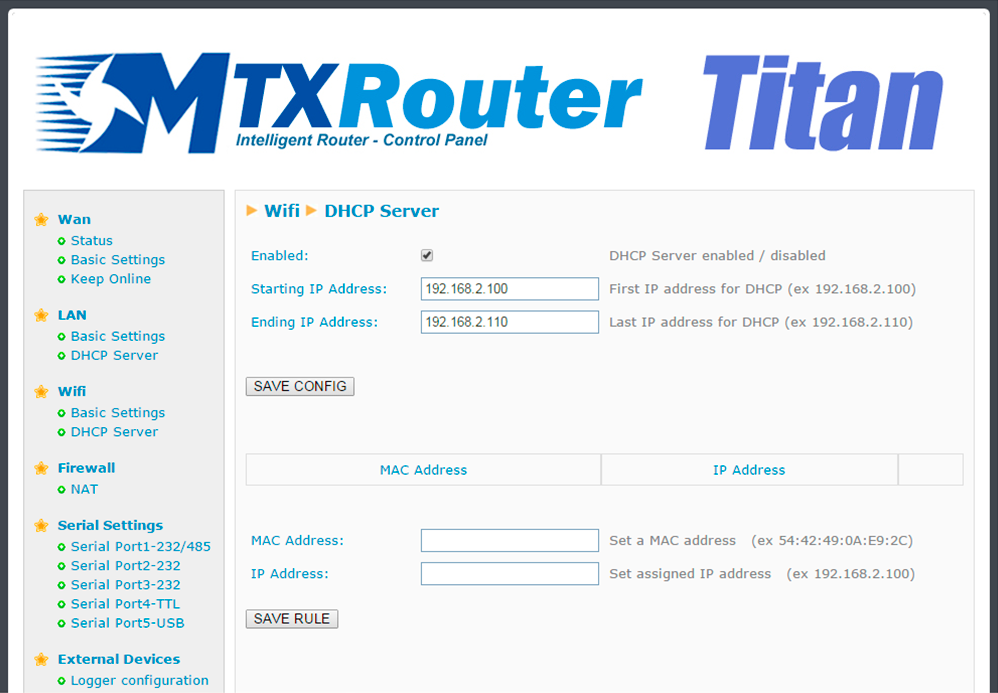
In this section we see how to enable and configure the DHCP server assigned to the router’s WiFi interface.
- Enabled: if selected, the DHCP server belonging to the Ethernet interface will be activated
- Starting IP address: indicates the first IP address that the DHCP server will assign
- Ending IP address: indicates the last IP address that the DHCP server will assign
- MAC address/IP address: these two parameters allow the DHCP server to always assign the same IP address to a particular MAC address
ADDITIONAL NOTES
- Once the configuration is finished, click “SAVE CONFIG” to save the changes. Click “SAVE RULE” for each MAC/IP pairing that we wish to create. Up to 10 can be created.
- Remember that the router should be restarted for the changes to take effect.