Tunnel – Configuration Procedure
¿Buscas alguna otra cosa?
In this section you will create your first GPS-serial tunnel and we will guide you through every step of the procedure. You will create a TCP server tunnel, connect from your PC and transmit/receive data.
You Need:
- PC with Windows 2000 or XP operating system possibly with an RS232 serial port. If you have a PC without an RS232 serial physical port, you can use a common USB-RS232 converter
- An RS232 serial cable to connect MTX-Terminal to the RS232 PC port. The cable must be pin to pin connected (pin1-pin1, pin2-pin2, pin9-pin9). Do not use a null-modem cable (crossed connection)
- Cinterion MES (Module Exchange Suite) application software which is free, please ask for the download link.
https://www.dropbox.com/s/rw4tswmpmlbkkz4/mes_2.7.0.0.zip?dl=0 - If you use a USB cable instead of an RS232 cable, you will need the modem drivers. If you do not have them you can download them from the FTP or request them at gsmsupport@matrix.es
Table of Contents
MES Installation & Configuration
MES application. What is needed for?
MES software will allow you to see your MTX-Terminal modem as a memory stick.
MES means “Module Exchange Suite” and it is a Cinterion application.
MTX-Tunnel application is stored inside the flash memory of the terminal. To access to the flash memory you need the MES application so you need to extract and edit the “config.txt” file.
-IMPORTANT NOTE. In the previous version of MTX-Tunnel, the configuration file was MTX-Tunnel.jad. On MTX-Tunnel do not use/edit this file.
The MTX-Tunnel configuration file is “config.txt” file. After being extracted from the internal terminal memory you can edit it with a normal text editor, like Windows Notepad.
After editing this file you have to copy it again into the terminal’s internal memory using MES application software.
ATTENTION. MES application MUST be configured BEFORE using it for the FIRST time
How is MES application configure?
After installing the MES application, you have to configure it. This MES application needs to know the COM serial port of your PC, which is connected to MTX Terminal modem.
Go to “My Computer” and look for a blue icon.
Right “Click” this icon and select “Properties”. Then, select COM port in “Port” section.

You can see the COM ports available in your computer. From this list select the COM port which the MTX terminal modem is connected to and then “Click” on “Apply” button. Now the MES application is configured. This step is not needed if you do not change the COM port to another available one.
If instead of connecting your computer using the modem DB9 connector you prefer to connect it via the microUSB connector, you will need USB drivers.
For MTX-3G versions: https://www.dropbox.com/s/bdxcm1ec9qrbavb/EHSx%20Driver%20v1113.zip?dl=0
For MTX-4G versions: https://www.dropbox.com/s/77ebcwmeqd8zmz2/ELS61.rar?dl=0
Once the drivers are installed, Windows will show several virtual COM ports. For MTX-3G versions, choose port 4 or 5 (in this case they are the ports COM27 and COM28).

In case of MTX-4G versions, choose port 1 or 2 (in this case they are the ports COM65 and COM64).

FIRST MTX-Tunnel Configuration
If you are not familiar with MTX-Tunnel, we recommend you do this test configuration to learn about the “MTX-Tunnel TCP-Server” scenario. Follow these steps:
- Do NOT apply power to MTX modem terminal. Do not insert a SIM card into MTX Modem. Open the SIM holder.
- Connect the terminal modem to the computer using a normal RS232 cable (not null modem).
- Apply power to the modem and wait at least 10 seconds.
- Then, if the modem does not have a SIM card, MTX-Tunnel enters into CONFIGURATION mode.
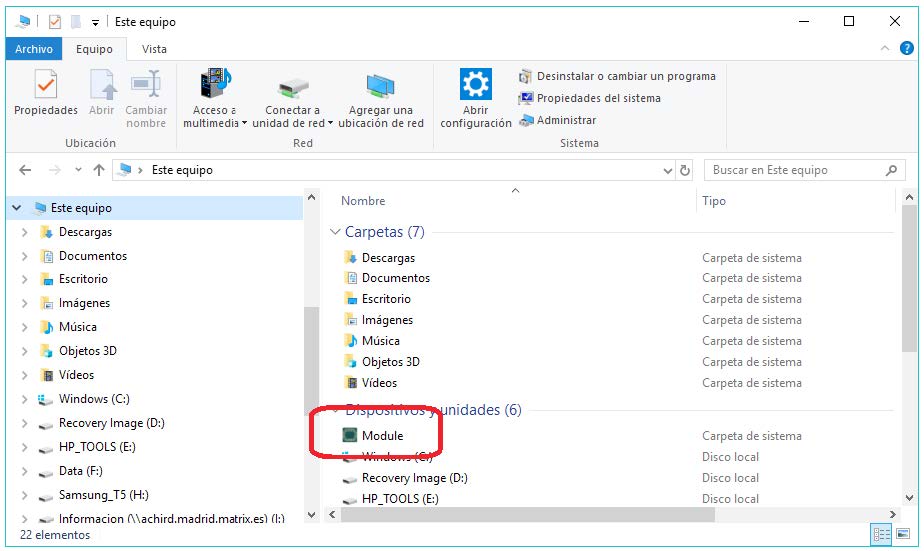
- Please “double click” on MES icon in “My computer”. This screen will appear:

- Please “double click” into “Module Disk A: /” (or press ENTER) to see files into MTX-Terminal modem memory.
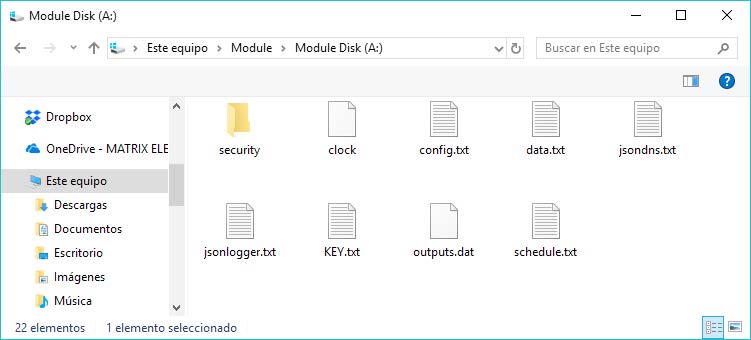
- If you can see the files, copy/paste “config.txt” into a hard disk computer directory to edit it. This is because this file cannot be edited in this memory; you have to do in your computer.

- Open the “config.txt” file with Notepad. The “config.txt” configuration file contains the main information for running MTX-Tunnel application correctly. Write this configuration as follows:
MTX_PIN: 0000
MTX_mode: server
MTX_urc: on
MTX_model: MTX-IOT-3G
GPRS_apn: movistar.es
GPRS_login: MOVISTAR
GPRS_password: MOVISTAR
GPRS_timeout: 0
GPRS_DNS: 8.8.8.8
TCP_port: 20010
COMM_baudrate: 115200
COMM_bitsperchar: 8
COMM_autorts: on
COMM_autocts: on
COMM_stopbits: 1
COMM_parity: none
FIREWALL_enabled: off
SMS_allPhones: on
- For the first time please just modify the BLUE marked fields.
- MTX_PIN parameter: please write your SIM Card’s PIN number to be used. If it doesn’t have a PIN, write 0000.
- In MTX_model please write which MTX-Terminal you’re going to use (you will find the name on the sticker on the bottom of the modem). It is preferable to use the P/N (9 digit number) that you will find on the same sticker.
- It is also IMPORTANT to modify and write the GPRS_apn, GPRS_login, GPRS_password parameters of the SIM card network operator.
- We recommend that you use your common or familiar/popular SIM card for this first “handson” use, like Movistar or Vodafone. We have noticed that other not well-known network operators use Proxies and block entry connections (in same way the ADSL router in your home/office does). Otherwise, you will have to use NAT.
- Low cost or virtual operators can be used for client connections/configurations (MTX_mode: client) but not for Server connections/configurations (MTX_mode: server) like we do in this example because incoming connections are blocked.
- Please check with your operator if Proxy is used.
- Save the changes in the “config.txt” file and copy it into MTX terminal memory using MES to overwrite the old one.
- After this please switch off or remove the power from the modem. Insert the SIM card and close the SIM holder. MTX-Tunnel is now ready to use.
Testing MTX-Tunnel Configuration
- Open a HyperTerminal or another similar terminal application like putty. Configure PC R232 serial port with the same value MTX has; i.e. the same as the “config.txt” example (115200, 8, N, 1 and HW flow control).

- Then, apply power to the modem connected to the computer. You will be able to see the green LED flickering slowly which indicates that the terminal is looking for GSM network registration. After a few seconds (not more than 60) you will see the LED flickering with a fast 1 flash every 4 seconds. This indicates that the terminal is registered with the GSM network. After a few more seconds you will see a blue LED turn on. This means that the modem is connected to the 2G/3G/4G network and has an IP from the operator (Note: the configuration of the LED behavior can change. Check the section of configuration parameters: MTX_blueLEed, etc.)
You can also check in the HyperTerminal window application (MTX_urc is on) messages from MTX-Tunnel. You can check that the IP shown is the IP that your network operator has assigned. Now MTX-Tunnel is READY. It is waiting for incoming connections in the 20010 configured port.

- Open ANOTHER HyperTerminal session. Now, do not use the COM port option, choose the TCP/IP Winsock option and specify the IP address above and the 20010 TCP port.

- After pressing the “Open” button you will see that you are connected to MTX-Tunnel using the serial port in the HyperTerminal window. The GPRS-serial gateway is done. You will see the message ^MTX_CONNECTION_ESTABLISHED indicating the entering TCP connection.

- Now, everything you write in the second HyperTerminal window is received by MTX-Tunnel and sent to the COM serial port. If you write (send) “HOLA, COMO ESTAS” from HyperTerminal TCP/IP WinSock connection, it is received in the other MTX-Tunnel HyperTerminal window.

In summary, now you have created your first GPRS/3G — serial Gateway tunnel, like the following picture:
